2015.11.18 XPagesDay 2015 Session for controlling Drone by XPages, WebGL, Gyro and Motion sensor
XPagesDay is held on 11/18/2015 in Japan
XPagesDay 2015 is held on Nov 17,18 as online and onsite sessions.
Controlling a drone by Xpage on bluemix and IoT Foundation
Kazunori Tatsuki@KTrick has the onsite session on 11/18/2015 for demonstration of controlling drone by XPages on bluemix with Mr Takeshi Yoshida@SOLXYZ. We are going to explain the following technologies to control the drone in the session
- XPages on Bluemix
- IoT Foundations on Bluemix
- MQTT on Javascript
- Node.js
- Node RED
- WebGL
- Gyro and Motion sensor on smartphone
This project is still under development, but we've already finished the WebGL part to synchronize the drone on the browser like below.
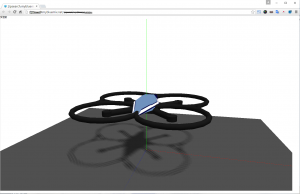

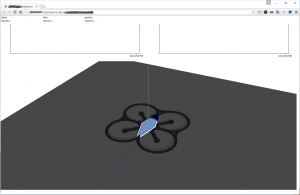

Since this is onsite session, please apply the session by following url.
http://partner.cons20.info/portal.nsf/pages/pub
XPAGESDAY 2015 details
Date:11/17/2015 (Tue), 11/18/2015 (Wed)
Place:11/17/2015 (Tue) - online session, 11/18/2015 (Wed) - online and onsite sessions at IBM Hakozaki Office, Japan
XPagesDay official site: http://xpagesday.com/xpagesday.nsf/home.xsp
How to change the XPages radio button design by CSS
How to apply the CSS design to the radio button in general
If you want to change the radio button or checkbox design by css, usually you need to prepare the HTML source code like below:
The most important point in above HTML is having the "input" and "label" tag as sibling hierarchy. Based on this html, CSS should be specified as following:
First of all, hiding the original radio design by setting opacity 0.
In the next step, you can design the button as you like by using label tag like below.
The css above is the one example of customizing the radio button. The HTML and CSS would be like the image below:
![]()
![]()
The imporatnt point of this CSS is the selector of ”input[type="radio"]+label:before”.
The "+label" means to specify the label tag which is sibling of selected input tag (type is radio). By doing this, customizing the design of selected button.
You might wonder why you need to use label tag instead of using input tag directly. The reason why doing this is because input tag cannot use ":before" and input tag itself needs to be hidden. Therefore label tag is needed to customize the design for radio butto/checkbox.
Actually the explanation above is nothing related with XPages. So you will be able to find many design example if you google for the radio button design.
Now I would like to write the article for how to change the XPages radio button design by using only CSS.
Understand the HTML hierarchy of XPages radio button (radio button group)
To apply the similar design to the XPages radio button, first of all, we need to understand the HTML source code which XPages generates for radio button or radio button group control.
Below example is for radio button group control.
Then, HTML source code is like below. (Domino 9.0.1)
As you can see, label tag has the input tag as a child. In fact, this html structure makes much harder to customize the design for radio button / checkbox.
No way to inform the checked status of radio button to the label tag
In the first example of CSS above, there is selector of "input[type="radio"]:checked+label:before". This means "when radio button has been checked, change the sibling label design!". However as the XPages' HTML structure, you cannot use the selector like first example because generally CSS cannot specify the PARENT element by CHILD element status. ( in this case, input:checked cannot inform the status to the label tag)
(It is actually possible if you use the Javascript like jQuery though...)
Never give up! Applying the design only by CSS!
As I explained, XPages cannot use the example CSS above. So I needed to find the other way to apply the custom design.
Using "box-shadow"
After spending a lot of try and error, the CSS for XPages radio button control became like below:
In this CSS, "label:before" specifies the outline of radio button, and "label:after" specifies the checked radio design. The point of this CSS is masking the checked radio design by using "box-shadow" for checked and unchecked status.
I know this CSS is more complicated. However you don't need to apply any javascript or any other html attribute value, and control 100% by just using CSS.
By the way, this CSS does not work on IE8 or less since "box-shadow" is part of CSS3 and IE8 does not support it.
Deep dive more
For more advanced CSS style, for example, you can use the image for radio button design.
The XPages source code below applies the three different type of images and express checked status by using opacity.
The image below is the result. When you click the icon image, the image color is displayed clearly and unchecked radio image turns to subtle color.


(日本語) 2015年4月22日14時から「IBM Dominoアプリケーション on Bluemix」のセッションを行います
Sorry, this entry is only available in Japanese.
How to set 'date only' or 'time only' values in fields through XPages
XPages always save date and time in a field
When a form has the fields with "date only" or "time only", then the stored data format are different between Notes Client and XPages.
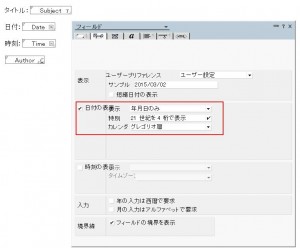
For example, I prepared the field with "date only" named "Date" as following (sorry, screenshots are all Japanese) :
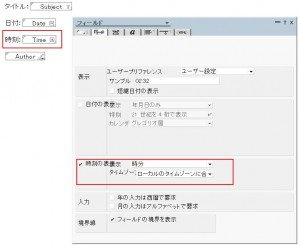
And also field with "time only" named "Time":
Now I saved a new document with this form from Notes Client (9.0.1 FP3), then I got following fields' data.
As you see, "Date" field has "2015/03/02", and Time field has"14:35:00"
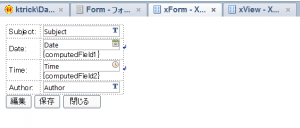
As the next, I created the simple XPage to save a new document with same form and fields so that I can compare the data between Notes Client and XPages.
Below is the source code for Date field and Time field in XPages.
Date Field
Time Field
Each inputText specify date, time to the Type attribute of convertDateTime.
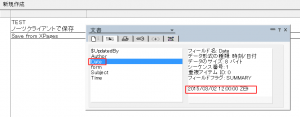
After saving a new document from this XPage, below is the screenshot of stored field data:
So both of fields have "yyyy/MM/dd hh:mm:dd ZZ" format.
Why you need to save "date only" or "time only" data from XPages?
I just don't post this blog to argue which format is proper way and why XPages behaves differently.
In the real world, I think you or your customers already have the NSF apps and you may want to improve them as the web application by XPages. In that case, especially you decide to keep using the NSF from both Notes Client and XPages, then I recommend to adjust the field format to Notes Client one instead of XPages one so that all existing documents are supported both Notes Client and XPages without changing data.
Use setAnyTime()、setAnyDate() of NotesDateTime class
Maybe there are a lot of way to achieve what I want below. But one of easy way is using NotesDateTime class of SSJS.
The SSJS above converts the DateTime field format by using setAnyTime()、setAnyDate() in PostSaveDocument event after saving the XSP document .
(日本語) IBM Domino Application on Bluemix について、ConnectED 2015にて
Sorry, this entry is only available in Japanese.
XPages - How to expand a specific category in the view as default
Control Expand/Collapse of the category view
To control Expand/Collapse status of the view in XPages, you just have to use [ExpandLevel] in view data source.
For example, Set "0" to expand, "1" to collapse as default.
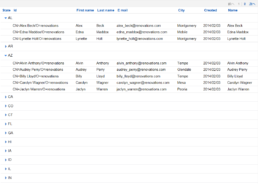
Then Is it possible if you want to collapse the view as default except the specific category like below?
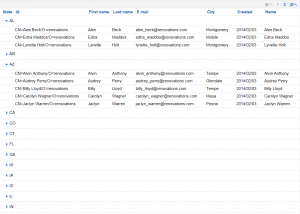

Expand only the specific category as default by SSJS
Use the following Serverside Javascript code in afterPageLoad event to expand the specific category.
In the above case, the last line(L4) specifies the first category to expand.
Like this sample code, you can control more if you use SSJS. In this case, I use DominoViewDataModel object. If you are interested in this object, you can see more detail from this link.
You might be able to get more ideas to control view data source directly.
XPagesDay 2014 「SSJSでも使える!Javascriptでオブジェクト指向プログラミング入門」スライド公開
XPagesDay 2014 (2014/11/18) 【A-3】「SSJSでも使える!Javascriptでオブジェクト指向プログラミング入門」で使用したスライドを公開しました。







![[A 3]SSJSでも使える!Javascriptでオブジェクト指向プログラミング入門](https://www.ktrick.com/wp-content/uploads/2014/11/Capture-uai-258x147.png)